Using the app#
Every page in Exchange Certificate Manager, in the order you'll usually need them.
The log panel along the bottom shows every Exchange command as it runs, warnings in amber and errors in red. Open log folder opens C:\ExchangeCertManager\Logs, where each day has its own log file.
Connect#
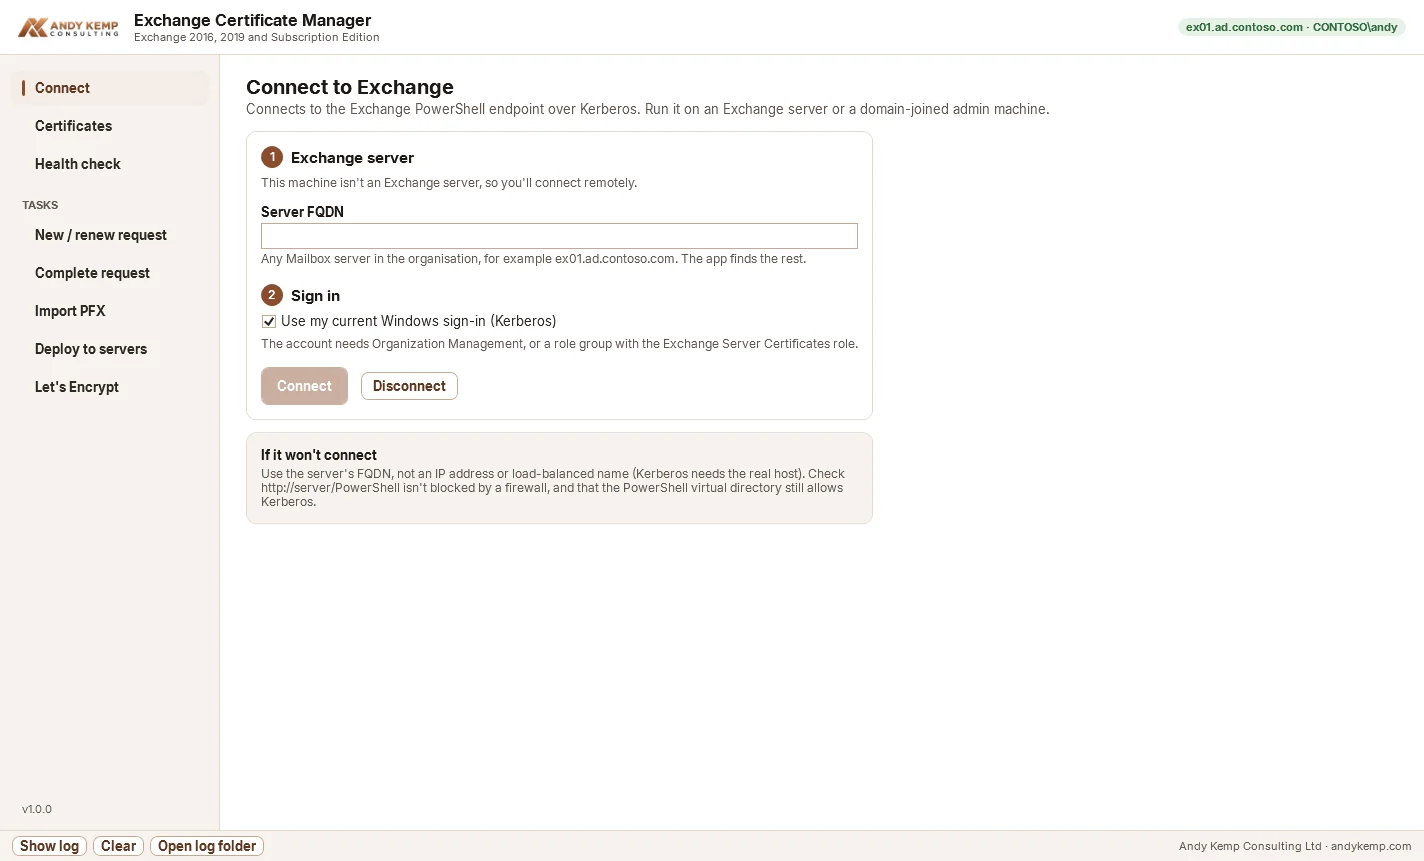
Connects to the Exchange PowerShell endpoint of the server you enter, over Kerberos.
- Server FQDN: any Mailbox server in the organisation. Use its real name, not an IP address or a load-balanced name: Kerberos needs the host's own name.
- Use my current Windows sign-in: the default. Untick it to enter another account's user name and password.
When it's running on an Exchange server, the app spots that and fills the server in.
Certificates#
The inventory: every certificate on every Exchange server, grouped by thumbprint, so a certificate on two servers is one row.
| Column | Shows |
|---|---|
| Certificate | The common name, with tags for the Exchange Auth certificate, self-signed certificates and pending requests |
| Expires | Days left: green over 60, amber under 60, red under 30 or expired |
| Issuer | The issuing CA |
| Servers | Which servers hold it |
| Services | What each server uses it for |
Use Search to filter by name, SAN or thumbprint. Self-signed certificates are hidden unless you tick Show self-signed.
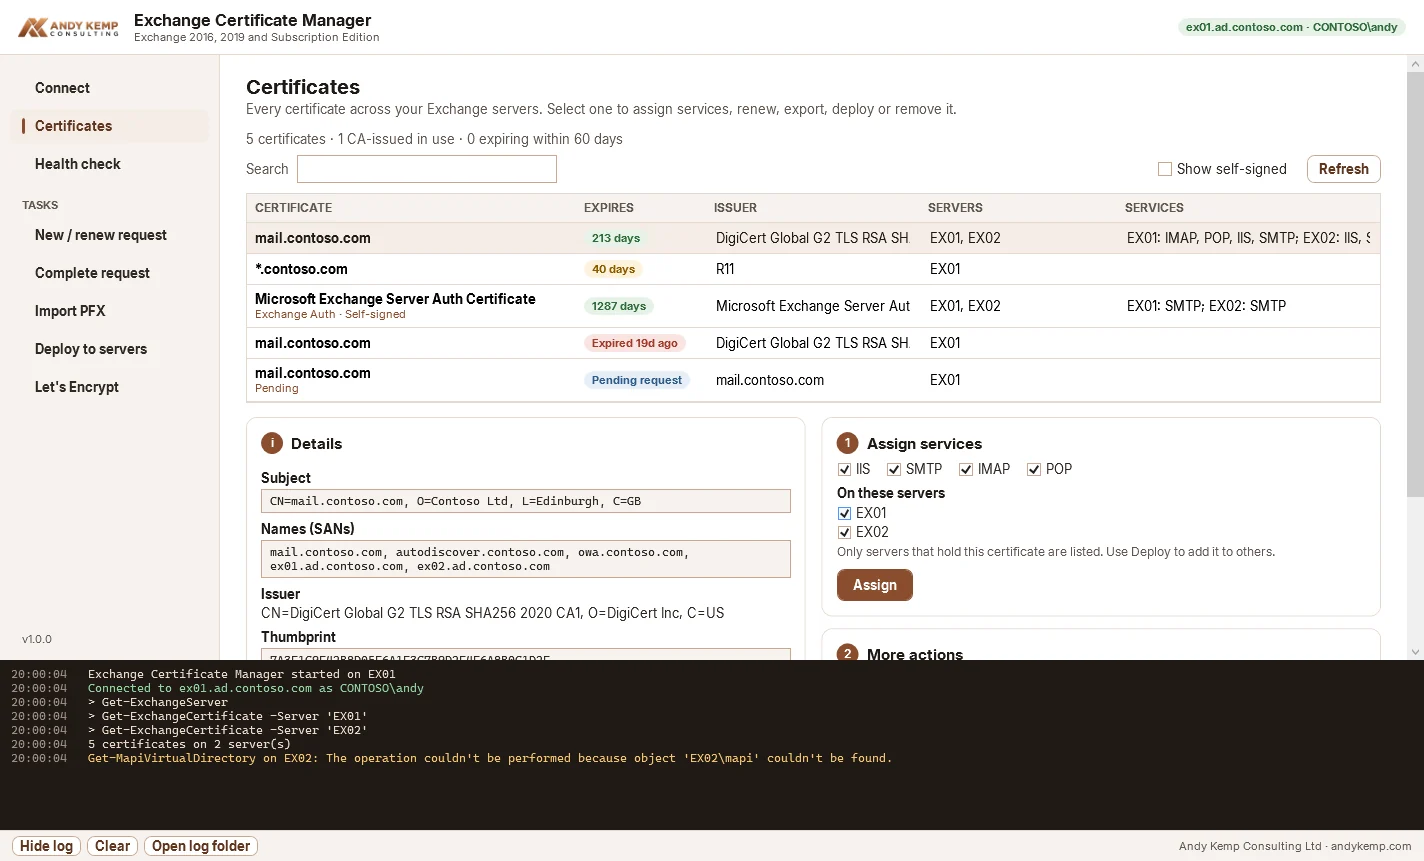
Select a certificate to see its subject, names, issuer, thumbprint and where it's installed, then:
- Assign services: tick IIS, SMTP, IMAP or POP and the servers, then click Assign. Only servers that hold the certificate are listed.
- Renew…: opens New or renewal request with the same names filled in.
- Deploy to servers…: opens Deploy to servers with this certificate chosen.
- Export PFX…: saves the certificate and private key to a password-protected
.pfx. Only possible if the private key was marked exportable. - Copy thumbprint
- Remove from ticked servers: asks first and warns if it's still assigned anywhere. Removing the Exchange Auth certificate is blocked.
Assigning SMTP
Assigning SMTP replaces the default SMTP certificate. If you're hybrid, run the health check afterwards: connectors that name a certificate by issuer and subject (TlsCertificateName) need to match the new one.
New or renewal request#
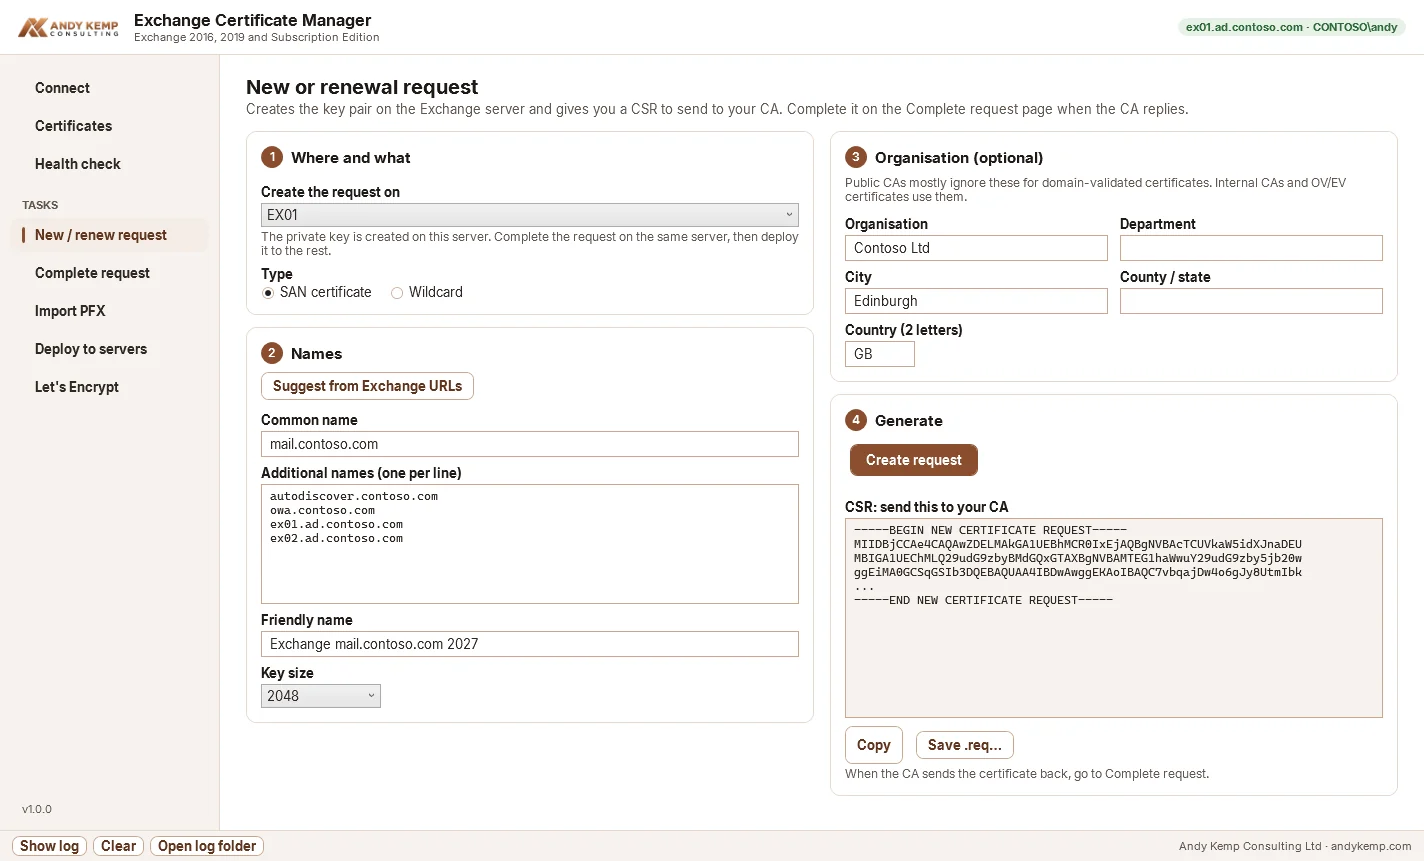
Creates a certificate request (CSR) on an Exchange server. The private key is created on that server and never leaves it, so complete the request on the same server.
- Create the request on: choose the server.
- Type: SAN certificate or wildcard.
- Names: click Suggest from Exchange URLs to read the internal and external URLs from every virtual directory, Outlook Anywhere and Autodiscover, plus
autodiscover.for each accepted domain. The common name defaults to themail.name. Check the list and add or remove names. - Friendly name and Key size (2048 or 4096).
- Organisation (optional): used by internal CAs and OV/EV certificates. Public CAs ignore these fields for domain-validated certificates.
- Click Create request, then Copy or Save .req… and send it to your CA.
The app warns you about names public CAs won't issue for, such as .local. They're fine for an internal CA.
To renew, select the certificate on the Certificates page and click Renew…: the names, wildcard setting and server are filled in for you.
Complete request#
When the CA sends the certificate back, complete the pending request with it.
- Pick the pending request. Requests are listed by the server that holds the key.
- Browse to the CA's file:
.cer,.crt,.p7bor.pem. A.p7bwith the full chain is best. - Choose what happens next: Assign services, and Copy it to these servers too for the rest of your servers.
- Click Complete request.
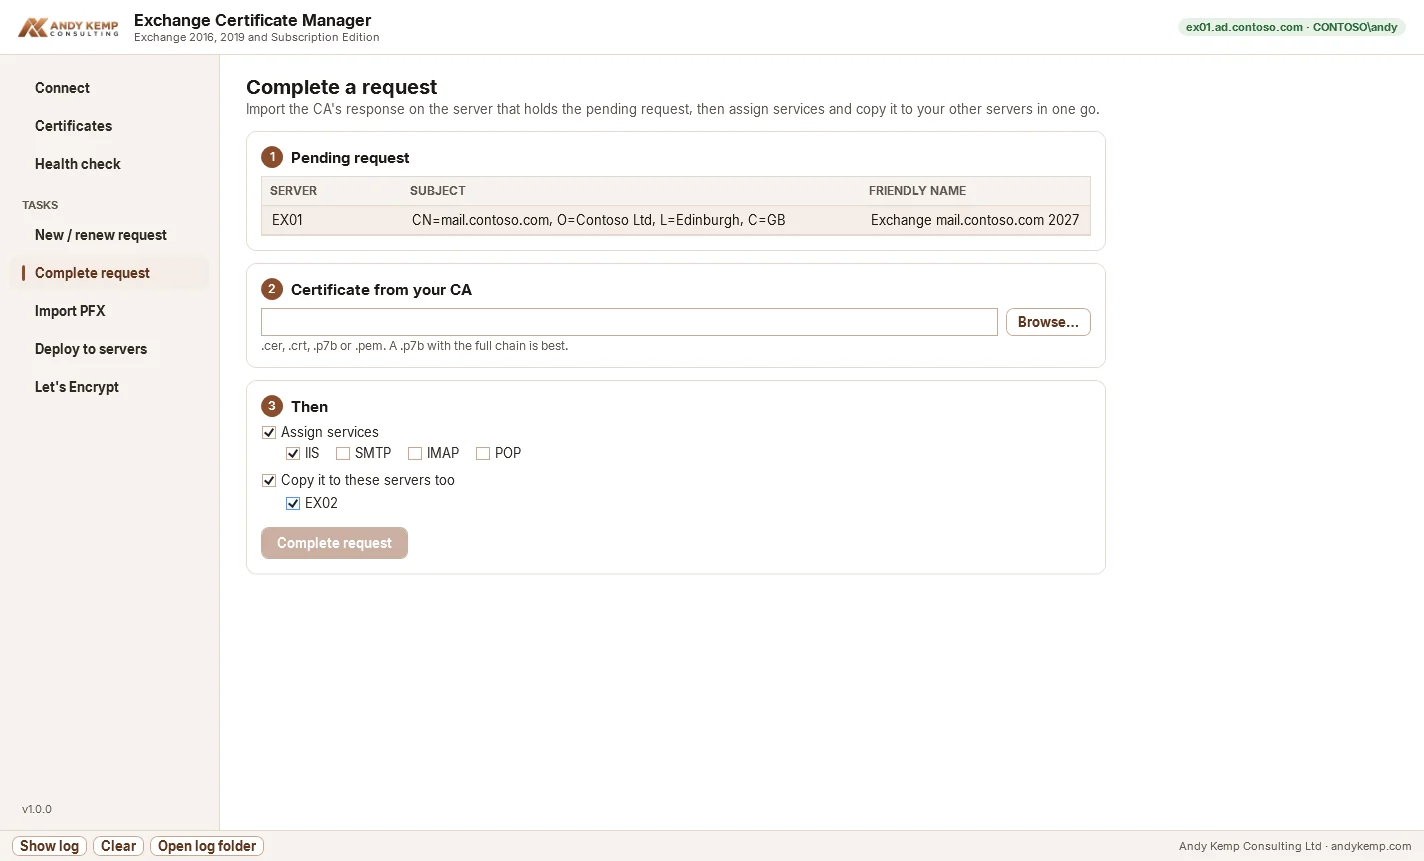
Copying to the other servers exports the new certificate once, imports it on each server and assigns the same services, the same as Deploy to servers.
Import PFX#
Installs a certificate you already have as a .pfx or .p12: one exported from another server, bought with a CSR made elsewhere, or a wildcard you use on other systems.
- Browse to the file and enter its password.
- Click Check file. The app opens the file on your machine first and shows its names, issuer, expiry, thumbprint and the chain certificates it contains. A wrong password, a file without a private key or an expired certificate is caught here, before anything changes in Exchange.
- Set the friendly name, tick the servers and the services, then click Import.
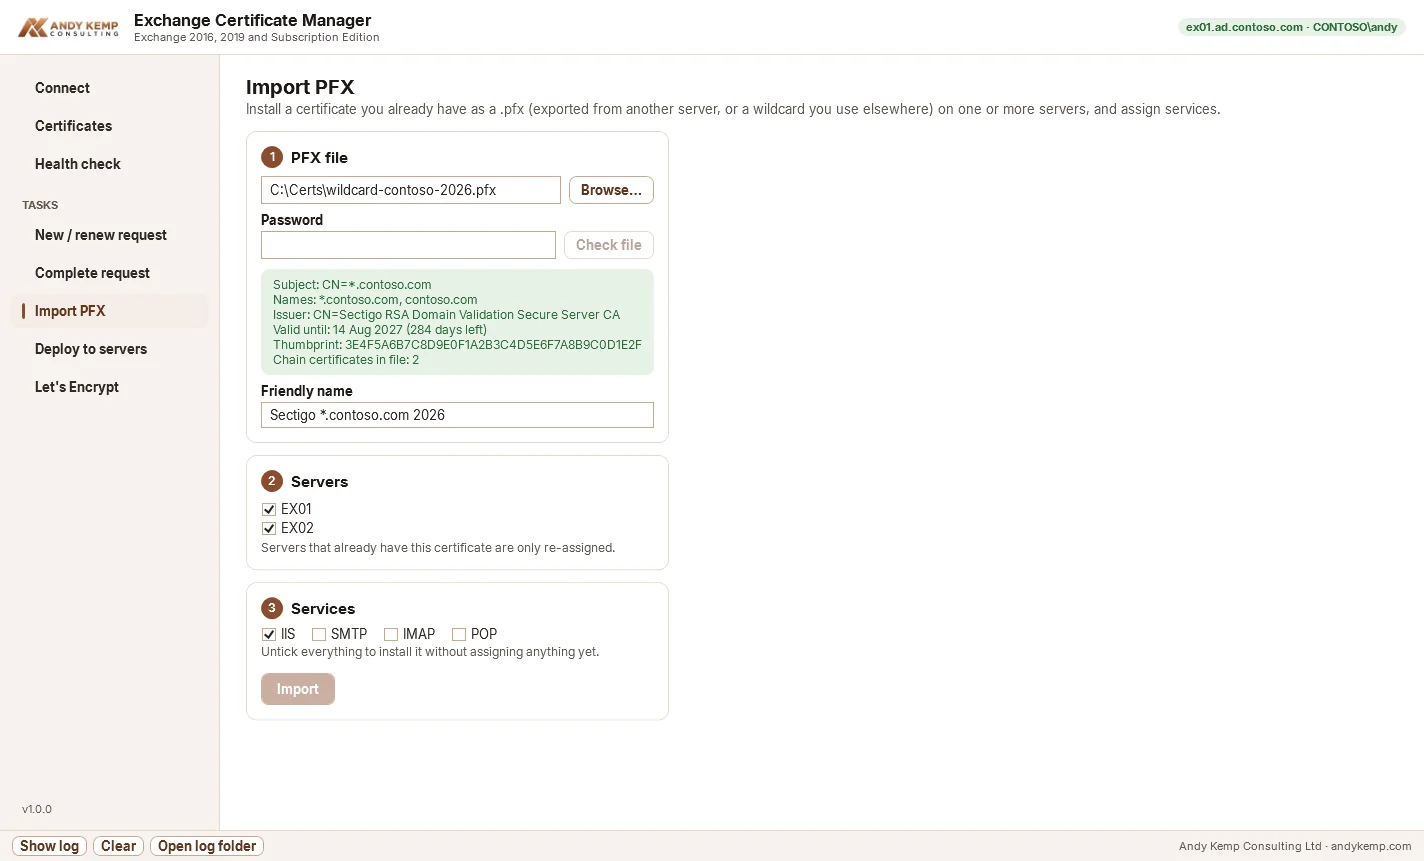
Servers that already hold the certificate aren't imported again, only assigned. The private key is marked exportable, so you can deploy or export it later.
Deploy to servers#
Makes every server match: exports the certificate once from a server that holds it, imports it on each ticked server that doesn't, and assigns the same services everywhere.
- Choose the certificate. The source server is shown underneath.
- Tick the servers.
- Tick the services. Untick them all to copy the certificate without assigning anything, which is right for the Exchange Auth certificate.
- Click Review and deploy…. A summary shows exactly what will be imported where and what will be assigned. Nothing changes until you confirm.
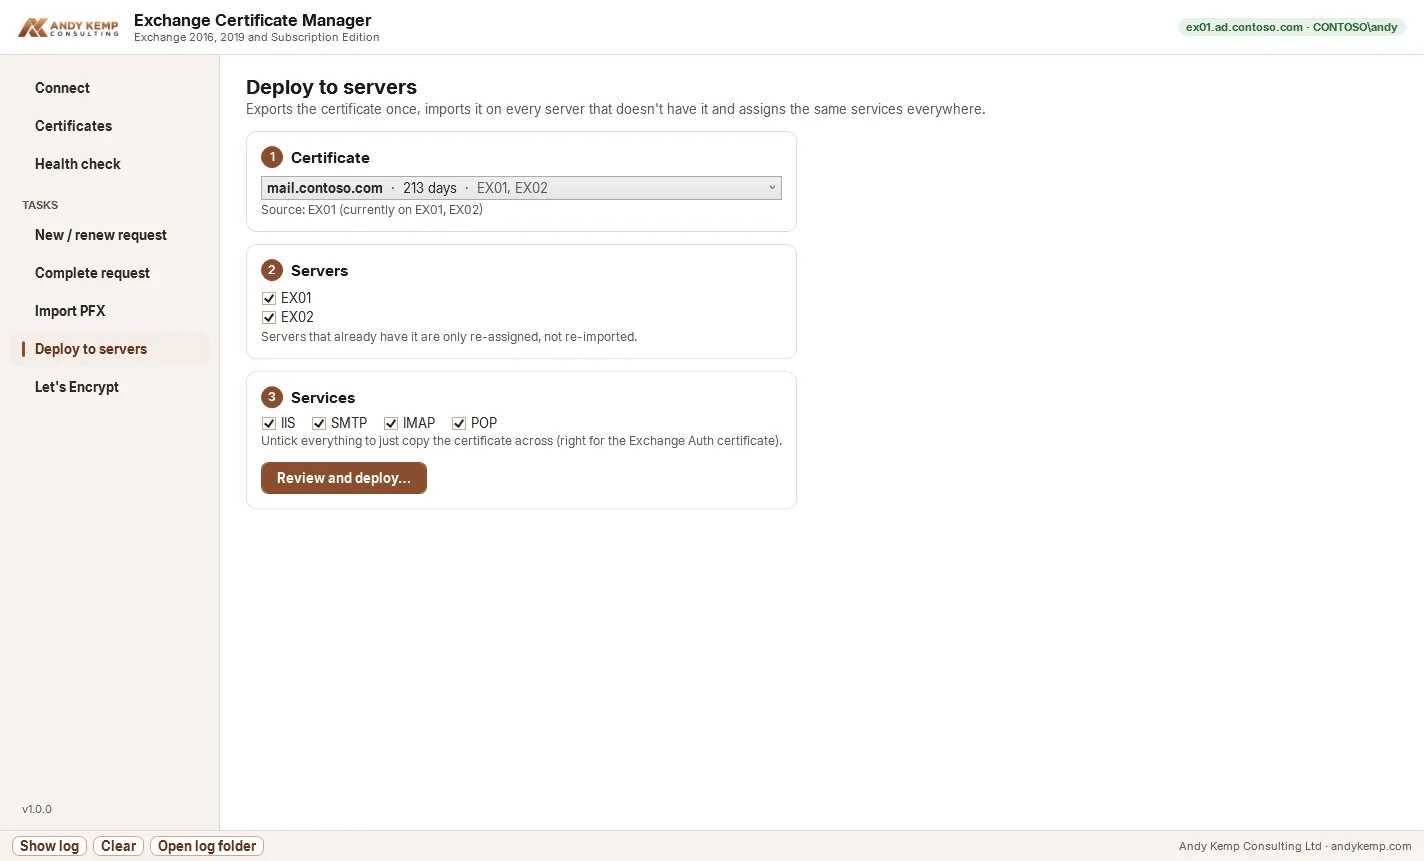
The certificate's private key must be exportable on the source server. Certificates created by this app always are.
Let's Encrypt#
See Let's Encrypt.
Health check#
See Health checks.